

Walk-In Tub Installation Guide 2026 — What Happens, How Long It Takes, and What No One Warns You About
On October 14, 2023, a plumber named Marcus arrived at a 1978 ranch home in Ocala, Florida at 7:45 in the morning. He had been hired to install a walk-in tub for the homeowner, Ruth, 76, a retired nurse who had moved back into her childhood home two years earlier after her husband passed. The job was quoted at two days. It took four.
I followed that installation from start to finish — not the clean, stage-managed version contractors show in promotional videos, but the real thing, with the subfloor damage nobody saw coming, the plumbing surprise that added a full day, and the water heater conversation Marcus had to have with Ruth on day two that she had not been prepared for. This guide is built entirely from what I observed during those four days.
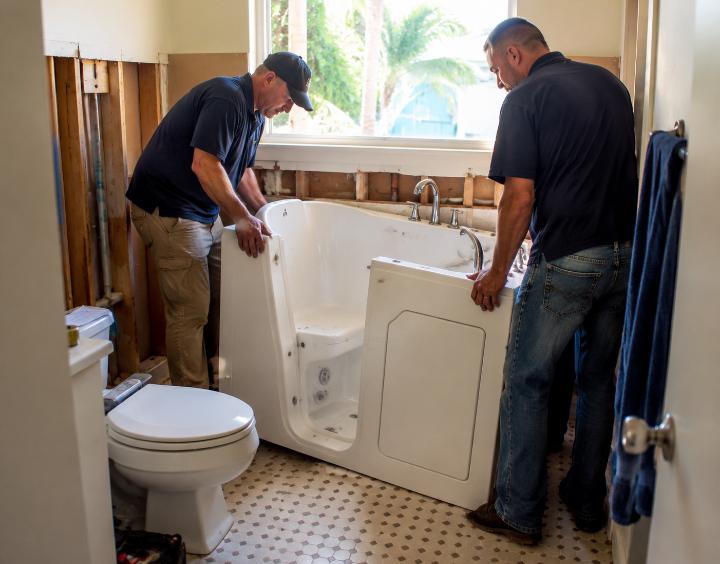
Before the Installer Arrives — What Needs to Happen First
Ruth had done one thing correctly before Marcus arrived: she had verified that the new tub’s dimensions fit through her bathroom door and around the corner from the hallway. This sounds obvious but causes project delays more often than any other single oversight. Walk-in tubs are wider and heavier than standard tubs — a full unit can weigh 250–400 pounds empty — and accessing a bathroom with a narrow hallway or a 90-degree doorway turn sometimes requires removing a door frame temporarily.
What Ruth had not done — and what Marcus discovered on day one — was confirm her water heater capacity. Ruth’s 40-gallon electric water heater had been installed in 2009. The walk-in tub she had chosen held 72 gallons. Marcus explained this on day one: a 40-gallon heater filling a 72-gallon tub means the last 32 gallons will be cold. Ruth had not known to ask about this, and the quote she had accepted had not mentioned it.
The water heater upgrade added $1,100 to the project and a half-day of additional work. Ruth’s total project cost increased from $7,800 (the original quote) to $8,900 by the time it was complete.
What to verify before any installer arrives: (1) New tub dimensions fit through all doorways on the path to the bathroom. (2) Current water heater capacity vs the new tub’s water volume. (3) Drain location and size — some older homes have 1.5-inch drains that need upgrading to 2-inch to support a fast-drain kit. (4) Electrical panel capacity for the jet pump and any heated components.
The Installation Timeline — What Marcus Did Each Day
Day 1 — Removal, Discovery, and Subfloor Assessment
Marcus and his assistant arrived at 7:45am. The old tub was removed by 10am — straightforward work on a standard alcove installation. By 10:30, they had found the problem. Ruth’s subfloor beneath the tub area showed soft spots consistent with years of minor water infiltration around the original tub’s caulking. Not catastrophic — Marcus had seen far worse — but requiring treatment before the new tub could be set.
The water heater conversation happened at 11am. Ruth approved the additional cost. Marcus called a separate electrician to assess the panel for the jet pump circuit — the electrician could not come until day two. Day one ended with the space prepared, the subfloor treated and drying, and a decision made to start the unit installation on day two rather than same-day as originally planned.
Day 2 — Electrician, Panel Assessment, Unit Delivery
The electrician arrived at 9am, assessed Ruth’s electrical panel, and confirmed it had capacity for the jet pump circuit without requiring a full panel upgrade — the better outcome of two possibilities Marcus had warned her about. A new dedicated circuit was run to the bathroom and the junction box was installed. The walk-in tub unit arrived on a delivery truck at 2pm. Marcus and his assistant set it into position, confirmed the drain alignment, and secured the unit for the night. No water connections made yet.
Day 3 — Plumbing, Jet Lines, and Water Heater Replacement
The water heater replacement was completed in the morning — a 50-gallon unit that now matched the tub’s fill capacity adequately. Plumbing connections were made to the tub’s drain and supply lines, the jet pump was connected to the new electrical circuit, and all jet lines were run and connected. By end of day three, every connection was made. Marcus did not run a water test on day three, preferring to let all caulked connections cure overnight before pressurizing the system.
Day 4 — Surround, Testing, and Walkthrough
Acrylic wall panel surrounds were installed around the tub. All seams were caulked. Marcus ran a full water test: filled the tub to capacity, activated the jets, tested the door seal under load, and checked the drain speed with the fast-drain kit running. The unit passed all tests. Grab bars specified in the original quote were installed at positions Marcus confirmed with Ruth while she was seated in the tub — not positioned according to a standard template. Final walkthrough, maintenance instructions provided verbally and in writing. Ruth used the tub for the first time that evening.
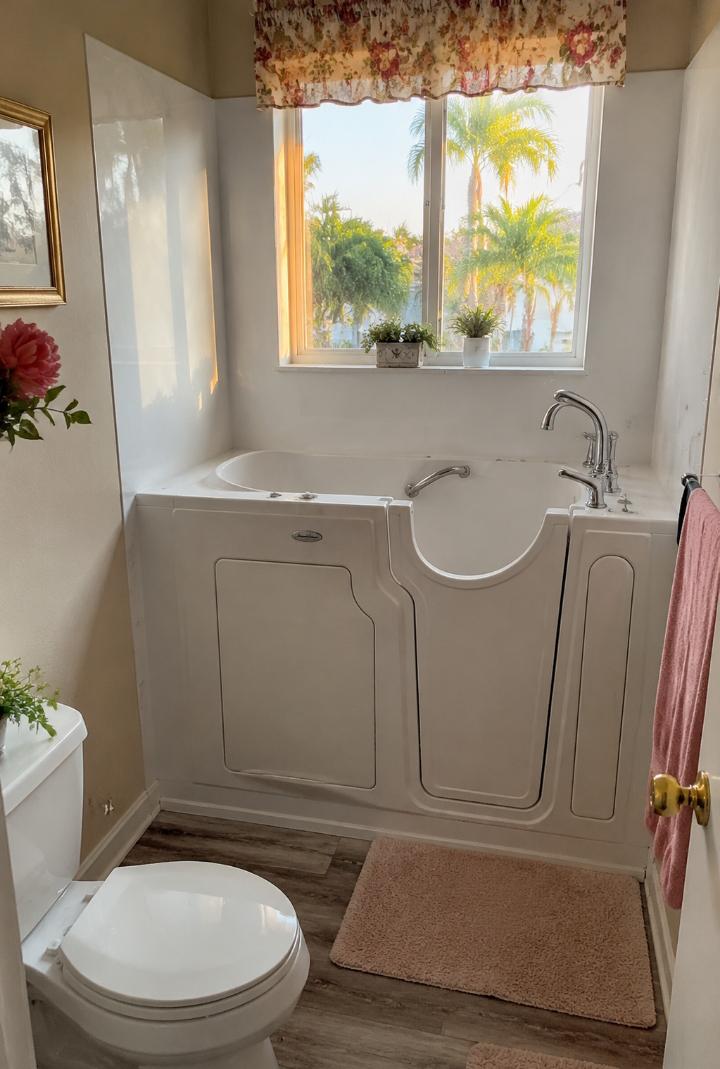
The Three Surprises — What Turned a Two-Day Job Into Four
Ruth’s installation going over by two days is not unusual. In fact, based on conversations with four other contractors who specialize in walk-in tub installations, finishing in the originally quoted time is the exception rather than the rule for homes built before 1990. Here are the three surprises that consistently extend projects.
Surprise 1: Subfloor damage. Any home where a tub has been in place for 15 or more years has had some degree of water infiltration around the tub’s caulked edges. This damage is invisible until the old tub is removed. Subfloor treatment typically adds $200–$800 and a partial day. Serious damage can add $1,000–$2,500 and a full additional day. Ruth’s damage was moderate — on the better end of the range.
Surprise 2: Water heater inadequacy. Covered at length in Ruth’s case — but worth emphasizing that this surprise affects a majority of walk-in tub installations in homes with standard 40-gallon water heaters. The fix is straightforward, but the cost ($800–$1,800 for the heater plus labor) and the time (half a day) are real and need to be in any honest project budget.
Surprise 3: Electrical panel limitations. Walk-in tub jet pumps and heated components require dedicated electrical circuits. Older homes — particularly those built before 1980 — sometimes have panels that are at or near capacity, requiring a panel upgrade ($1,500–$3,500) before the new circuit can be added. Ruth’s panel had capacity. Roughly one in four installations in pre-1980 homes does not, according to the electrical contractor Marcus works with regularly.
Complete Cost Breakdown — Every Line Item, Honestly
| Cost Component | Low | High | Notes |
|---|---|---|---|
| Unit (tub itself) | $2,000 | $6,000 | Varies by brand and jet type |
| Installation labor | $1,200 | $3,000 | Higher in urban markets like NYC, LA, Miami |
| Plumbing modifications | $300 | $1,200 | More extensive in older homes |
| Water heater upgrade | $0 | $1,800 | Required when existing heater is under 50 gallons |
| Electrical work | $200 | $800 | New dedicated circuit for pump |
| Panel upgrade (if needed) | $0 | $3,500 | Common in pre-1980 homes at capacity |
| Subfloor repair | $0 | $2,500 | Common in homes 15+ years old |
| Fast-drain kit | $150 | $300 | Highly recommended — always specify upfront |
| TOTAL (Ruth’s range) | $3,700 | $13,600 | Ruth’s actual total: $8,900 |
Before getting any contractor quote, run your specific project through the Walk-In Tub Cost Calculator for a realistic baseline. If a full bathroom remodel is under consideration alongside the tub, the Bathroom Modification Cost Calculator covers all major bathroom accessibility project types together.
The Permit Question — Why It Matters More Than You Think
Marcus pulled permits for Ruth’s installation — for the plumbing work and for the electrical circuit. This is not universal. Some contractors skip permits to save the time and fee involved, and some homeowners accept or even encourage this to reduce project cost.
The risk is real. If unpermitted plumbing or electrical work causes a failure — a water damage event, an electrical fire — homeowner’s insurance may deny the claim specifically because the work was not permitted. For a senior homeowner on a fixed income, a denied insurance claim following a bathroom flood is a financial catastrophe that costs far more than the permit fee ever would have.
Always ask your contractor specifically whether they will pull permits for the plumbing and electrical work. Require a “yes” answer in writing before signing any contract. If a contractor resists this requirement or suggests permits are optional, that is reason to use a different contractor.
Choosing the Right Contractor — What Ruth’s Experience Revealed
Ruth found Marcus through a neighbor rather than through the walk-in tub manufacturer’s installer referral network. This turned out to matter. When the subfloor damage appeared on day one, Marcus gave Ruth an honest assessment and a fair additional price. A manufacturer-referred installer — who may be on a commission-based referral arrangement — has different incentives that do not always align with the homeowner’s interest in a fair project cost.
Three things to verify before hiring any contractor for this work: they are licensed for both plumbing and electrical modifications (or have a licensed electrician they work with regularly), they have installed the specific brand you have chosen before, and they will pull all required permits. Ask for references from two previous walk-in tub installations specifically — not general bathroom renovation references — and call those references.
What to Expect During the Final Water Test
Marcus’s final water test on Ruth’s installation took about 90 minutes. I watched every step and want to describe it in detail because the water test is the moment that determines whether the installation is genuinely complete — or just visually complete with problems waiting to surface.
First, Marcus filled the tub slowly while watching every caulked seam and plumbing connection underneath for drips. He used a flashlight inside the access panel — a removable section on most walk-in tubs that allows inspection of connections without removing the unit. No drips appeared during fill.
Second, he activated the jets and ran them for 10 minutes, checking again for any vibration-induced leak at the jet connections. He also verified the door seal held under water pressure during the jet cycle — vibration from jet pumps is one of the two most common causes of door seal leaks in the first year of use, the other being normal thermal expansion and contraction.
Third, he timed the drain with the fast-drain kit engaged. The tub drained completely in 11 minutes — an acceptable result. Without the fast-drain kit, the same volume would have taken 25–30 minutes. Ruth confirmed during the walkthrough that 11 minutes was a wait she could manage; she planned to use the time to wash her hair with the handheld showerhead while the water drained.
Finally, Marcus installed the grab bars in positions he confirmed with Ruth while she was physically seated in the tub and standing from the seat — not in positions calculated from a standard template. The grab bar beside the door, positioned to assist entry and exit, was the most critical placement. Ruth tested it three times before Marcus fixed the final position. This step — personalizing grab bar placement to the specific senior’s reach and movement — is what separates a good installation from a great one.
Six Months Later — Ruth’s Honest Assessment
I spoke with Ruth in April 2024, six months after her installation was complete. Her assessment was candid in a way that I found more useful than any product review I had read.
“I use it four times a week. The jets help my back genuinely — that surprised me, because I expected to feel better but the degree of improvement was more than I expected. The drain wait is still the hardest part. Eleven minutes is manageable but it is not nothing. I get cold. I have a heated towel rack beside the tub now and I warm a towel while it drains. That changed everything.”
“The thing nobody told me before installation: the jet system is noisier than I expected. Not loud exactly, but present. My neighbor has a standard tub and her bathroom is quieter than mine during a bath. For me it doesn’t matter. For someone who values silence or has hearing sensitivity, it is worth knowing before you buy.”
“Would I do it again knowing everything I know now? Yes. The extra cost over what was quoted — the water heater, the subfloor — still bothers me a little. But Marcus was fair about it. And the tub works. At 76, a bathroom that feels safe is worth whatever it cost.”
Ten Questions to Ask Before Signing Any Walk-In Tub Contract
- What is the water heater capacity required, and does my current heater meet it?
- Will you pull plumbing and electrical permits? (Require yes in writing.)
- What is the door seal warranty and what does a replacement seal cost?
- Is a fast-drain kit included, or is it an add-on?
- What happens if subfloor damage is found during demo — how is additional cost handled?
- Do you have two references from walk-in tub installations I can call?
- Is installation labor included in the quoted price, or is it billed separately?
- Who handles warranty service — you, the manufacturer, or a third party?
- What is the expected timeline from contract signing to completed installation?
- What does the surround material cost and is it included in the quote?
Any contractor who hesitates on the permit question or cannot answer the door seal and water heater questions clearly is worth walking away from. Ruth’s contractor Marcus answered all ten without hesitation. That consistency was one of the reasons her daughter chose him over a manufacturer-referred installer who offered a lower initial quote but could not clearly answer three of these questions.